
1980's Film Cameras Remind Me that Metering is Hard
Built in meters in vintage cameras are primitive, and sometimes need some help

My mirrorless digital camera has spoiled me.
Before pulling my old film cameras out of storage, I had all but forgotten how a light meter actually works. I knew the basics, of course, but I hadn’t appreciated just how much modern gear does behind the scenes
Autofocus performance gets a lot of attention in photography discussion groups, but metering? That function operates quietly in the background, almost invisibly. And yet, it makes constant decisions for us, adjusting exposure in ways we barely notice until we shoot with something that doesn’t do it.
Then I picked up the 1980s Minolta XG-M, and reality set in.
As I’ve been scanning negatives from the first ten rolls of film I’ve shot in nearly two decades, I keep seeing underexposed frames. Shadows are murky. Grain is much more aggressive than expected. In some cases, I tried to recover detail during scanning, but there just wasn’t enough information on the negative to pull out.
That’s when it hit me: this meter is easy to fool. And I was trusting it too much.
Modern digital cameras are packed with computing power that, back when the XG-M was built, would have required a roomful of gear. They analyze a scene across multiple zones, recognize subject types, and make exposure decisions based on advanced algorithms.
The Minolta? Not so much.
It uses a simple center-weighted averaging meter, heavily influenced by whatever’s in the middle of the frame. Many cameras from this era used CdS photoresistors or early silicon photodiodes, both of which have limitations. CdS sensors, in particular, are slow to react and prone to drifting with age. Even silicon-based sensors in that era were limited by very simple processing.
Between the narrow metering pattern and the potential for aging electronics, these systems often need a helping hand. If you assume they’ll “just work,” you’ll likely end up with frames like the one below.
In this image, a bright sky threw off the meter, which exposed for the upper portion of the frame. The result: underexposed shadows, excessive grain, and murky tones. I tried to adjust during scanning, but the detail just wasn’t there.

With no sky or strong contrast in the frame, the meter did much better. Exposure feels spot-on, colors are rich, and the background falls away nicely. This is the kind of scene a vintage meter handles well.
Tips for Getting Better Exposures with Vintage Meters
Watch out for high-contrast scenes
If there’s a bright sky, snow, or deep shadows, your meter may need some help. Watch what it’s suggesting, and then meter while pointing at other areas of the scene. This will help you decide if you need to make adjustments.Tilt the camera slightly
Meter from a midtone or your subject (not the sky), then recompose. You’ll get a more accurate reading without blowing out or crushing shadows.Use exposure compensation, or adjust manually
If your camera allows, add +1 stop in backlit scenes. Or just mentally adjust and open up the aperture or slow the shutter.Practice the Sunny 16 Rule
On sunny days: f/16, shutter speed = film ISO (e.g. 1/250 for ISO 200). It’s a great gut check for whether your meter is in the ballpark.Watch your film stock’s latitude
Color negative film usually has more latitude than black and white. Slide film has almost none. Get to know the film you’re using, and watch some reviews on it; they usually push films to see how they react. Know what you can recover later, and what you can’t.Use a phone app meter to double-check
Phone apps like Light Meter or LightMeter Free can help verify exposure if you’re unsure. Great for tricky scenes or questionable meters. I paid $30 for Light Meter for a one-year subscription, but there are also free ones available.
This may sound like a lot of extra work, but after a little practice, this becomes second nature.

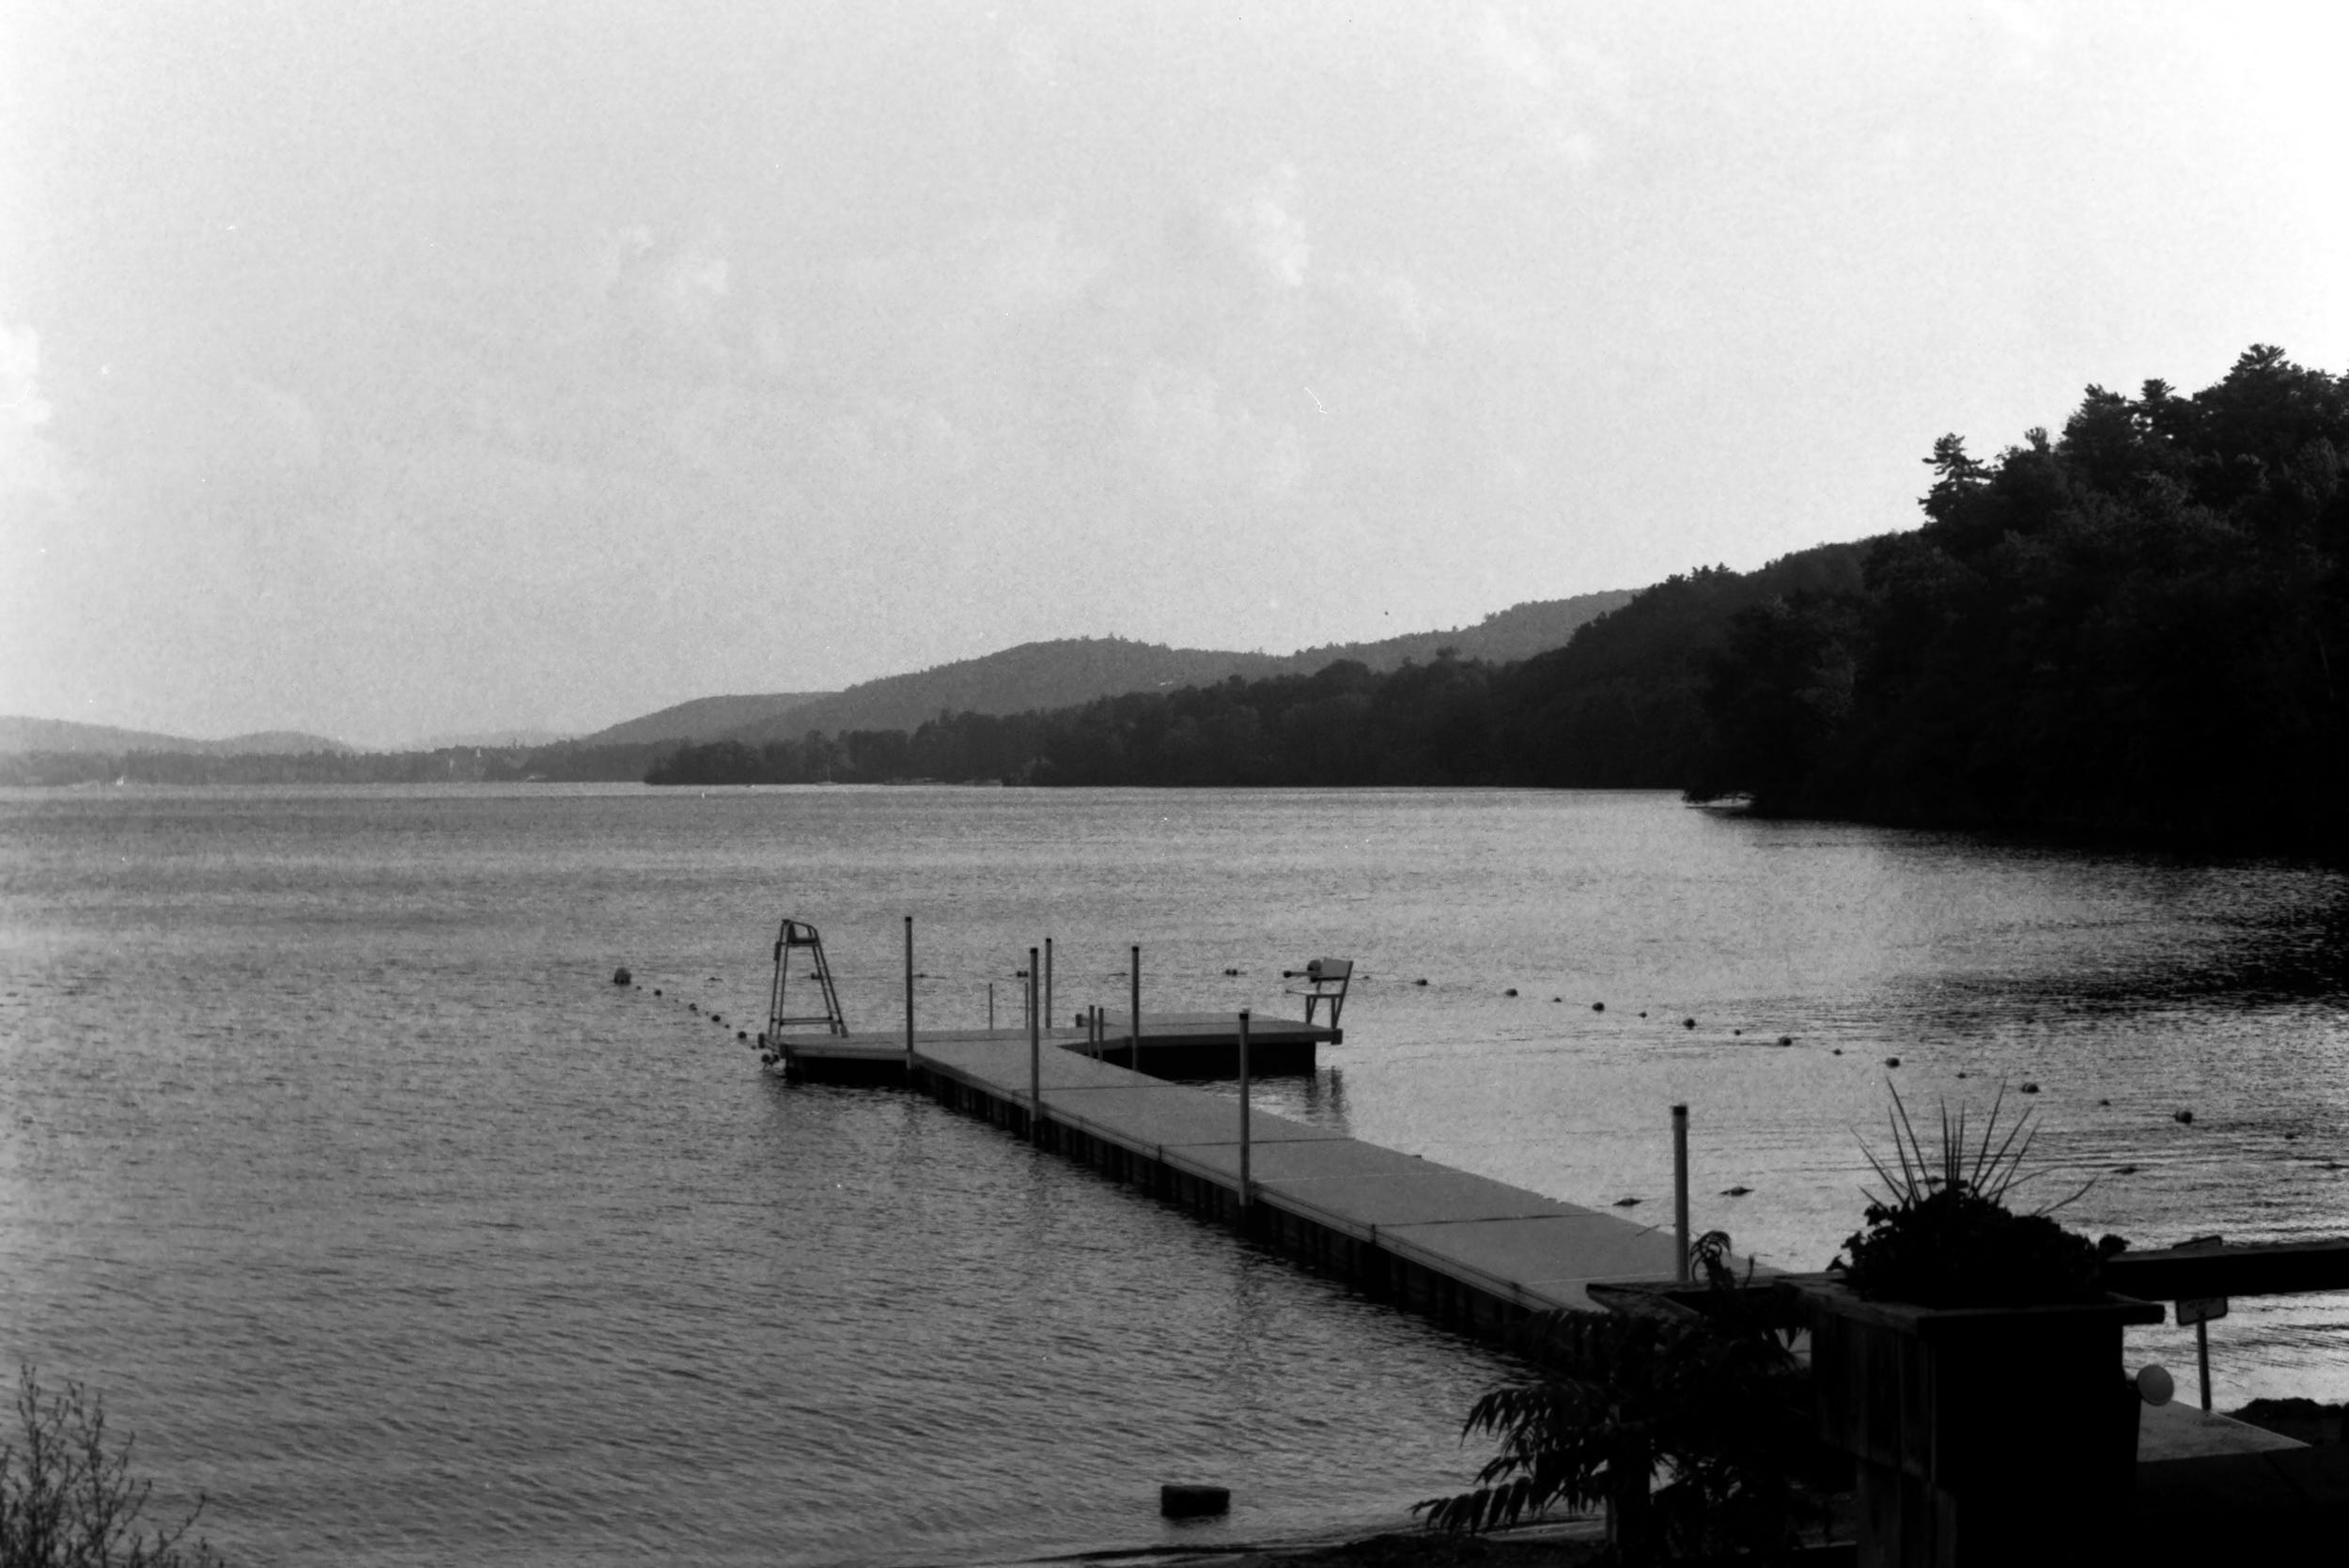
For this image, I put the camera in manual mode. Between the glare on the water and the sky, the camera was calling for more than the 1/1000 quickest shutter speed on the camera in aperture priority mode. I metered farther to the right, then set the camera’s aperture and shutter manually to get this shot.
As a GenX photographer, I learned photography on this gear. The reason I have started using it again, at least occasionally, is that it tests me. It makes me slow down and really think about what I’m doing. This is all part of it. It’s a part that I had not thought much about, but it’s part of it. And I’m enjoying the challenge.

✅ Where to Find Me
You can find more of my work on the web at: Simmons Photography
If you want to work with me, or inquire about licensing images: Contact Page
More of my work can be seen on Vero and Flickr.
💬 Closing Thoughts
I’m not sponsored by KEH, but if you are looking for a good vintage camera without a lot of surprises (and a store that backs their purchase), go to KEH.com and check out their vintage film gear. You will get better deals on eBay if you want to beat the price, but there are advantages to buying from a reputable dealer.
I've been scanning some old negatives (and by old, I mean some of my first photos, from the late 1960s and onward) and while many are very well-exposed, I'm surprised at how many aren't. And I thought I knew how to meter then! Tricky indeed, with old meters.
Concrete and grass. If it’s there meter off that and reframe. Works every time. Or get yourself a second hand Sekonic L308. Or even better a hand held spot meter. The money you spend will be offset by the money you save on film wasted. Heard of sketchy results using some phone apps and they are not as consistent as a a real light meter, which takes the guess work out, no doubt.